Wednesday, 12 November 2014

Paying to dispose of waste at the local tip

When we bought our first home together and started the process of renovating we knew it would be expensive but recently for anyone renovating a home things just got even more expensive due to charges implied at local tips and dumps.

For the first year of our renovation we spent a lot of time and money gutting the property. We hired around 5 skips and loaded these with waste products from the house.

However we weren't able to load old plasterboard into the skip as this needed disposing off separately so we stored all of the waste plasterboard in the garage and borrowed a van to take this all to the local tip ourselves. Now that we are closer to getting the house finished we no longer have the need to have a skip on the drive however as we are still working on the house there is still waste products that need disposing off. Again we have saved all these up until we have a van load and taken them to the local tip at Newquay.

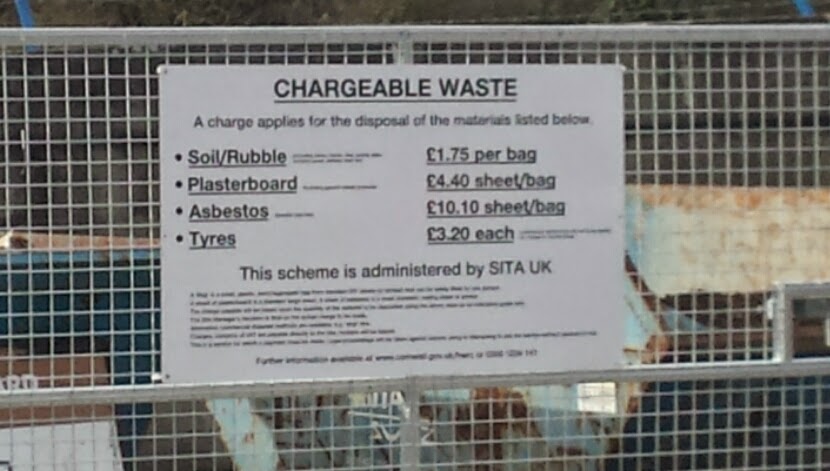
On arrival we see new fenced off areas which incur additional charges for disposing of waste. This includes Soil, Rubble, Plasterboard, asbestos and Tyres. When we moved into our house the access was completely blocked and had been used as a dumping ground and we removed 7 tyres alone not to mention the rest!
charges to use the local tip
 
Charges to dispose waste at the local tip in Newquay

We've removed all the internal walls downstairs, the bathroom floor and ceiling all the upstairs bedroom walls and a lot of this was plasterboard. Had we taken this to the tip with the new charges this would have cost us a small fortune. 

Now I am not happy about the charges as for first time buyers and renovators this increases the costs by quite a bit especially when it costs £4.40 per sheet to dispose of. When we ordered in the new plaster board sheets to renovate the whole house we ordered nearly 100 sheets and have added more since the beginning. Which means we have propably removed around the same amount and taking those to the tip now would cost us £100's of pounds to dispose of. 

Whilst recently cycling around the local countryside we have noticed a lot more fly tipping going on especially car tyres and it's no wonder when small businesses are struggling to make money and now incur additionally charges to dispose of rubbish, I understand that items like asbestos require specialist removal and disposal however for the general DIY person or someone doing gardening and removing soil it suddenly becomes expensive to remove waste. We are lucky we are nearly finished on the renovation of our home and most of the work left to complete is decorating but had these charges come into play a few years ago the build cost would have gone up by a few hundred pounds. 

I really hope that these charges do not increase fly tipping in the Cornish countryside, it already costs to gain a permit to access the tip for businesses and those in a van so this additional cost on top just makes things harder for small businesses and I just hope people can afford it and don't fly tip our beautiful region.

Sunday, 9 November 2014

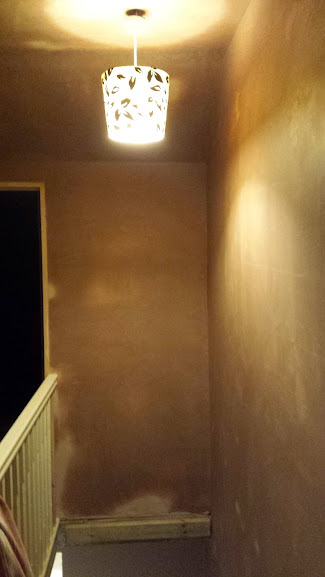
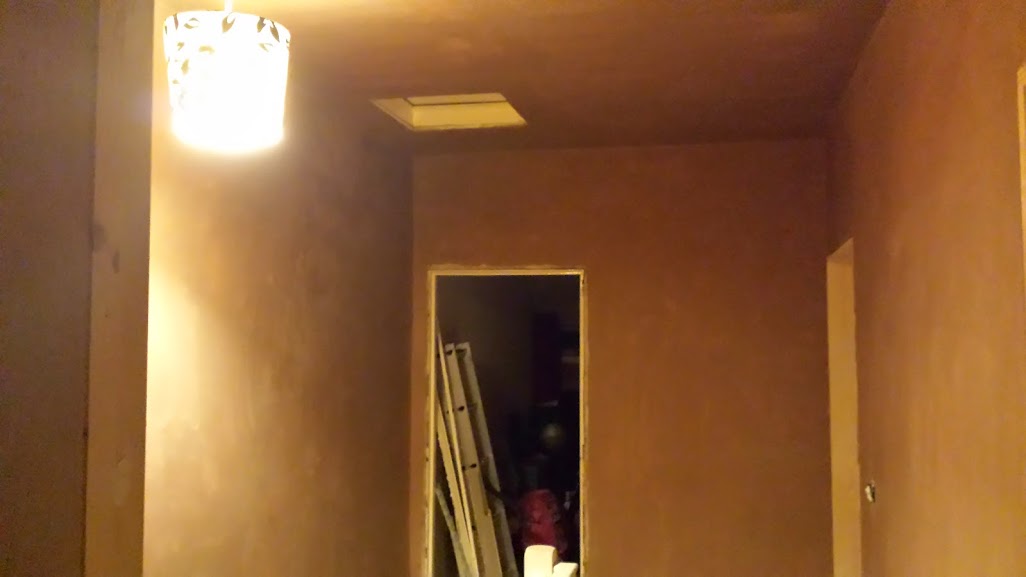
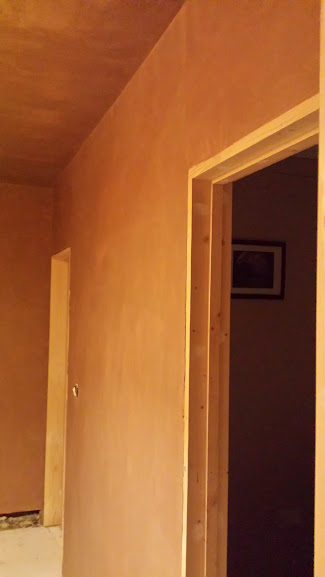
landing plastered transforming the upstairs

We bought our first ever house in September 2012 and started by completely gutting the property, when Christmas arrived we went to the parents for Christmas and enjoyed the luxuries of their home whilst ours purely resembled a building site. As we entered into 2013 we decided that we wanted Christmas at our house this year. We worked hard through 2013 to get as much done as possible and with a Kitchen and Bathroom and the downstairs 90% complete we held our first Christmas in our new home
As we entered into 2014 the work slowed right down as our finances were in pretty bad shape after pushing the build in the first year. 

Now each month we get a little more done and slowly the house creeps together. The past three months we have concentrated on getting our bedroom done but with that now 100% completed we move onto the next stage and that's the landing upstairs. 

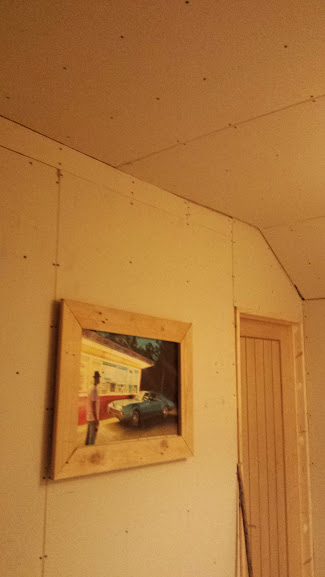
It was over 12 months ago that we made all the changes to the landing upstairs by moving the internal walls to create a wider landing and since then we have concentrated on the master bedroom so the walls have sat with raw plasterboard for the last year. 
Moving interior walls upstairs
With our master bedroom complete we had to make the decision where to work on next, we were both tempted to work on the next bedrooms but as these will be spare rooms and barely used we decided that the best use of our money this month was to get the landing plastered. As the wall is exposed at the bottom in the dining room it helps to complete downstairs, and as the new plasterboard also creeps into the bathroom it seemed the best use of our monthly budget as meant we could make a real difference in the whole house.  
Before Plaster After Plaster

Freshly plastered landing

Plastered landing in Cornwall

Plastered landing in Cornwall
Now we just need to wait for the plaster to fully dry so that we can start painting the walls, once painted we can add skirting boards and architrave to the doors and really complete the upstairs. We also want to create a feature out of the landing light and add a giant photograph to the wall. 

Work will now slow down as our money goes on presents for the family rather than presents for the house but as we enter 2015 the end of the renovation is in sight and with two bedrooms to plaster, decorate and carpet, a landing and stairs to carpet and furniture required downstairs we need to stretch our budget and the work that required but hopefully by the summer we will be very close to having a finished home and can then move onto working on landscaping the garden, the driveway and the house exterior. 

Saturday, 8 November 2014

Upcycling Ikea Bedside Tables

Building our first ever home has been done on the absolute shoe string of a budget, we have taken out loans and credit cards and worked overtime to fund the project. As we finally finish our master bedroom after two years living in our half home half building site we up-cycling our existing furniture to fit into the new décor of the master bedroom. I've been with my partner for over six years and since we moved in together we combined all our existing furniture. 

These Ikea bedside tables were from my partners flat and are around 10 years old. They don't suit our bedroom now that we have gone for a clean white approach to the room but painting them and up-cycling them makes them fit in perfectly and will now happily be a part of our new bedroom. 
We already have the paint and sandpaper in the garage so with no additional cost involved this was the best way to improve our bedroom without spending any money,

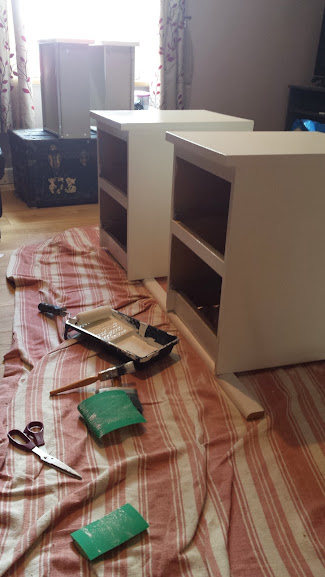
Ikea Malm bedside table
We first sanded the old bedside tables down to give the surface a key for the paint to adhere to.
painted malm ikea bedside table
With the bedside table sanded down it was time to give the item a coat of paint.
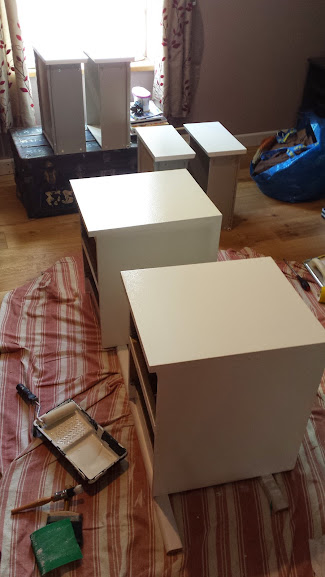
Up-cycled Malm Ikea bedside table
Both bedside tables are then painted, the draw fronts are painted and all that's left to do is let them dry and put them in the bedroom. For no additional cost we have turned our old bedside tables into shiny new clean white ones that fit the master bedroom perfectly. 
Up-cycled Malm Ikea bedside table


Friday, 24 October 2014

Our bedroom is complete! Check out the beautiful photographs

After weeks of work and weeks of blogging about the work, i'm really pleased that our bedroom is now complete. There are a few minor items to snag but we are now complete and have spent our first night sleeping in the new room. 
I guess now we might have a weekend off the renovations before starting the next room!
Would love to know your thoughts on the new bedroom.
Wall Lights

Wall Lights

New bed linen

New bed linen

Fully refurbished bedroom

New bed linen

New bed linen

New bed linen

New bed linen

DIY Dressing table

DIY Dressing table

DIY Dressing table

DIY Dressing table

Bedroom mirror

Grey oak effect vinyl

Oak Door

Door hande

Finished bedroom

Wardrobe door handles


Lamp shade from Habitat at Homebase

Lamp shade from Habitat at Homebase

Sheepskin rug and carpet

Sheepskin rug and carpet

Curtains and bedcage candle holder

For most of the items found in the bedroom these can be bought in these stores, the birdcage tea light holder and the sheep skin rug where originally ours but everything else was bought especially for this room makeover and renovation.


Tuesday, 21 October 2014

vinyl wrapping a dressing table and our new stool

Our bedroom has been our main project for the last few months from stripping it back to bare walls to new plaster board and plastering, but the biggest challenge was the decorating. We couldn't decide on wall colours to match the wardrobe doors and from then in it was impossible to invisage how the room would come together.

But little step by little step the room has taken shape and grown in character and has now become a beautiful room even if the room is nothing at all what either of us had in mind when we started the project.

The next job on the list was to vinyl wrap the dressing table and buy a stool. This was proving just as impossible as choosing the paint colour for the walls. After sending off for several different vinyl samples we decided on a grey oak effect vinyl to match the recently purchased grey curtains and cushions with a grey material covered dressing table stool from Atlantic Shopping's online store.

The dressing table looks beautiful and again nothing at all what I had in mind for the bedroom but on completion it looks perfect. Maybe it's best to go into house renovations with absolutely no idea what you want or what theme will suit the room as when it all comes together you get a nice surprise.


Vinyl wrapped dressing tableVinyl wrapping the dressing table

Next to fit some handles to the dressing table drawers and that's enough job complete and ticked off the list.


Sunday, 19 October 2014

It never rains but it pours!

This week we saw the weather turn a bit colder, the winds pick up and the rain start pouring. Our house has been one massive project for the last two years and although we took the house on as a project as quick as we are getting some parts finished other parts are needing new attention. 
On Friday night we saw quite a lot of rain in Cornwall and when I got home from work was annoyed to see that the back door had water leaking through it and into the kitchen and the garage roof was leaking like a sieve.
leaking back door
With the water swept and and distributed to dry it quicker and some buckets in place we are temporarily in control of the situation until the next down pour. We now need to add fixing roofs and doors to the long list of DIY that the house needs.

Leaking garage roof


Friday, 17 October 2014

Look our bedroom is nearly finished!!!! Some amazing before and after pictures.

I'm too excited even as I type that our bedroom is very, very nearly finished! I know I've been saying that for weeks but we really are very close now, so close in fact that we have actually made up the bed ready to move in!

We have three drawer handles to fit on to the dressing table, as well as the main door furniture to fit on the bedroom door. We need to buy a dressing table stool which is proving incredible tricky to find one to fit in with the rest of our bedroom and lastly we need to choose some vinyl to cover the dressing table and then we are finished! 100% finished and ready to move in, although I think we will move in this weekend regardless of whether we have chosen the vinyl and the dressing table stool as several hours have been spent both in stores and online looking for the perfect products and we can't find any that jump out and complete the room, so we would prefer to wait until we find the perfect products and move in anyway.

Here's how the room is looking right now. I'd love to know your thoughts....

Grey Curtains Grey Curtains

Plaster boarded walls

Decorated cornish bedroomDecorated cornish bedroom

plaster boarded door frame

Bedroom MirrorRenovating our bedroom

Finished decorated bedroom
Hard to believe the room looked like this just 10 months ago! 
Bedroom renovationBedroom renovation